Repost of a popular tutorial from my blog, Birgit’s Daily Bytes, from 2012. It is still a favorite method of mine for textured backgrounds!
SUNDAY, MAY 27, 2012
Gesso Stenciling: 2 Ways To Create Texture
In some instances Gesso also provides a barrier for the paint or ink and stops it from being “sucked” right up by the paper or canvas.
Gesso is most commonly white, even though it is also available in transparent, black and a whole array of colors now.
I often use Gesso in my Art Journaling as well as in my mixed media canvases. Not only for all the above reasons, but also because it can be a great medium to cover up things I want covered, or, applied a little thinner, cover things just enough to give it a great workable surface, but the print or image underneath is still visible!
Lately however, I have been getting into using Gesso for texture! Gesso always provides a little texture, even if just applied in it’s primer function, but it’s mostly just a slight roughening of the surface it’s applied to. I’m talking about real texture!
So, today I will share with you two ways to use Gesso for texture and embellishment on your art journaling pages or mixed media canvases.
You will need:
-
Gesso ( I use Grumbacher Gesso (Hyplar) Artists Acrylic Medium)
-
Stencil of choice (I’m using a Dylusions Stencil in this example)
-
Old gift card or credit card
-
Art Journaling page or canvas
-
Heat Gun

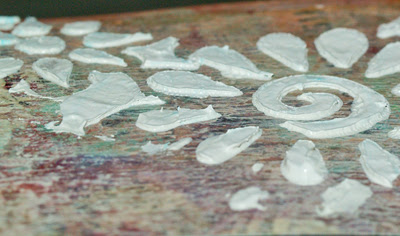
1.) Place the stencil where you want your texture to be on the page/canvas, scoop a little of the gesso onto your card and then scrape the gesso across the stencil. Random strokes works best, as it creates a less defined edge. Make sure you hold the stencil down well, so it doesn’t move and smudge your stenciled image.

Carefully lift off the stencil.

Let it dry and you have a nice little texture on your page.

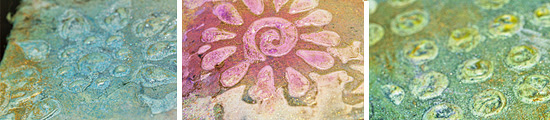
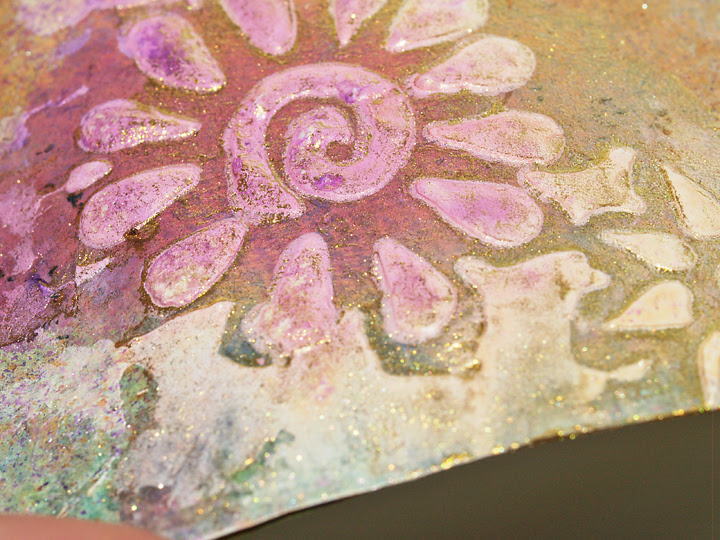
See how it’s raised as high as the stencil was thick. Once it’s dry, you can paint over it for subtle texture, or make a feature of it by highlighting it with inks, paint, shimmers or by running your stamp pads randomly and lightly over it. This will highlight the edges as well as random raised parts in the texture which makes for a great background. As it is gesso it will also still take stamps, pens, inks, etc.
2.) Or, you could do this:

Yes, that is the Gesso too, not puffy paint!
How do we do that? Simple!
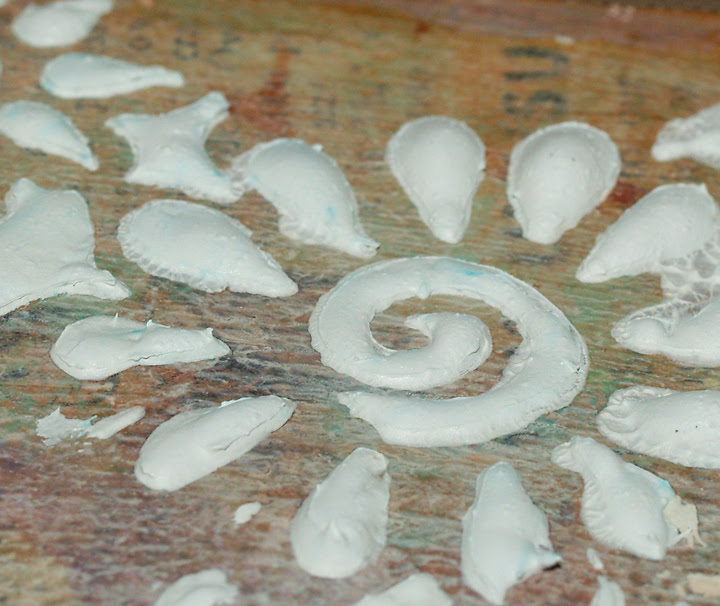
You do everything as above, only once you pulled the stencil off, instead of letting the gesso just dry, you use a heat gun. You can get in pretty close and within split seconds, you will see the gesso stencil image puff up like this:

I just love how perfectly round they puff up!
And you can control where you want your puffiness by where you point your heat gun, so you can puff up some areas but not others if you so choose!

Once all the areas are puffed up, just let your image cool down and the puffed gesso will dry in place. The great thing about it is, that it is pretty sturdy. It will actually hold that shape, even when you paint over it , but it still has a flexible feel to it, so if you wanted to push the pattern down randomly, it won’t crack or crumble!
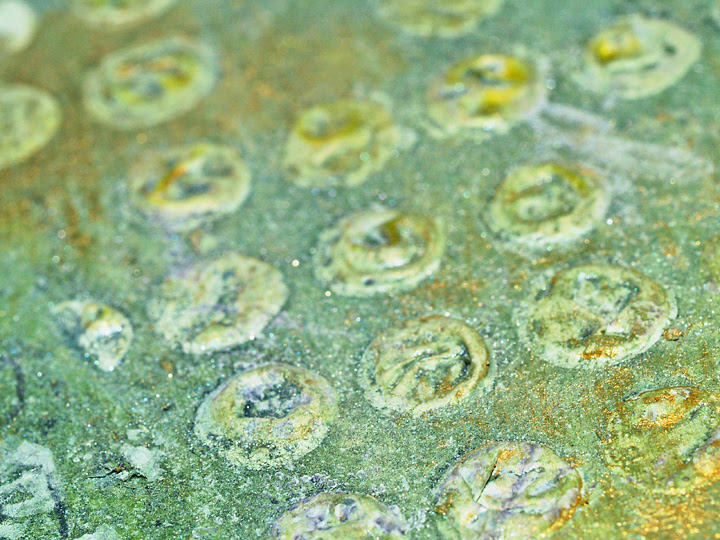
In this example, I pushed the dots back down a little, so the ink and shimmer could pool inside the dots too!
In this next example, I left most of it raised!
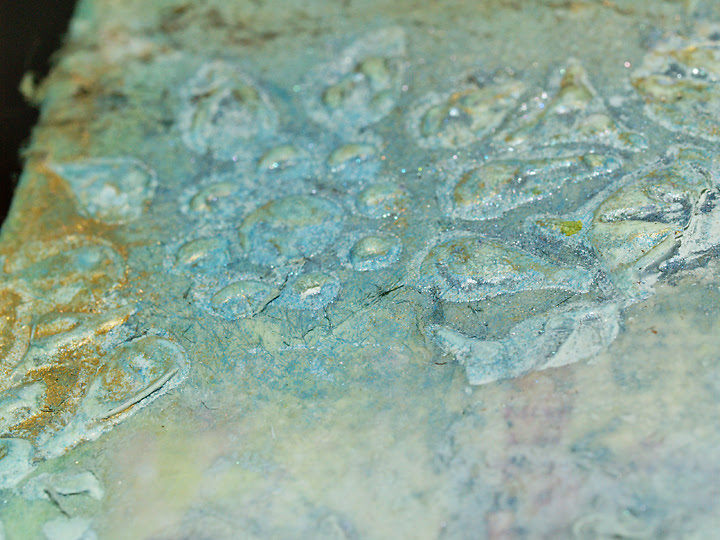
There are just so many possibilities to work with this stuff and get cool effects! Try coloring your gesso and then scraping it into a stencil! It makes for some awesome images and texture!


Love those ideas
Have you ever tried gesso paste/or gesso on glass?
Nice you can get it to poof before it dries. The other texture paste I used said to let it dry slow, then you’d have to reapply it.
Just learning. Thank you.
I’m just beginning to get into painting and learning all about gesso as well as different techniques and I found this very interesting. Thanks for posting it for everyone to see!