
Repost of another popular tutorial from my blog, Birgit’s Daily Bytes, from 2012.
MONDAY, APRIL 23, 2012
Print Transfer Technique
A quick and easy way to transfer some print material to your art journaling pages, that I came across mostly by accident and have since used on many an art journaling page!
You will need:
-
Art journaling page
-
Mod Podge
-
old book pages or sheet music
-
bone folder or popsicle stick (or you can use the back of your nail if you like)

I generally use this method when I’ve already layered on several paints, inks, stamps and splatters, so the transfer print sits on top of the page.
1.) Tear your piece of printed paper to about the size you would like the print to appear on your page. No need to be accurate – just roughly the size.

2.) Smear some Mod Podge on your page where you’d like the print. Again, no need to be accurate. Just more or less will do. I generally use my finger, but you can use a brush if you prefer. Use a generous amount, but not too much.

3.) Now you have to work relatively fast, depending on how much Mod Podge you used! Place the piece of print on top of the mod podge and burnish it either with the bone folder or the back of your thumb nail.

You just need to go over it a few times.
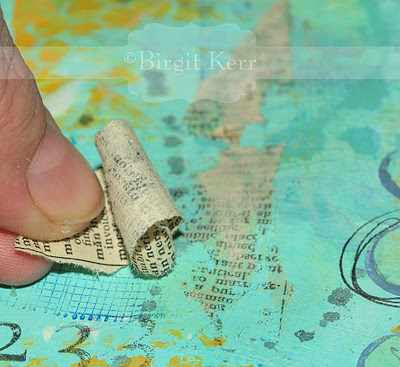
4.) Take the end of the piece of paper, and slowly start pulling. You will see that the print has transferred to the page. If it’s not transferring much yet, just press it back down and give it a bit more burnishing.

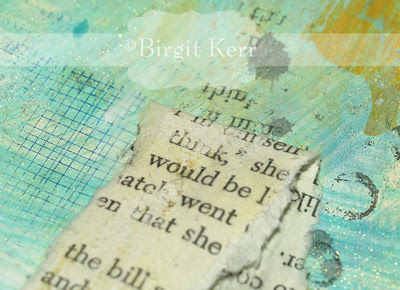
Keep on pulling as much or as little as you like. Very old paper tends to be more porous, so it tends to rip easier and leave more paper behind, but that’s ok. You just go back and and start pulling from another spot. You can leave as much or as little paper on as you like.

I quite like it when some of the paper remains, especially since the print that transfers onto the page is of course mirror imaged, but the print you don’t pull off isn’t, so it makes for interesting texture and visual interest!

Different kind of print/paper react differently to this method, so have fun experimenting!
Here I have a newer print and it transfers the print with barely losing any paper – also very nice!

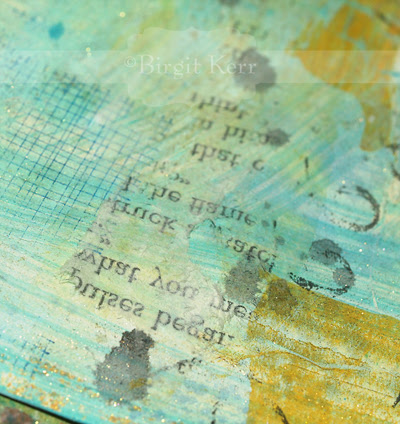
5.) Once you pulled everything off that you wanted to, let the mod podge dry completely.
And that’s it! Pretty simple, but very effective!
Of course you can do this with newspaper images too, just remember that whatever you are transferring will be mirror- imaged.
Oh, and one more little tip. Should you at any point after drying decide that you didn’t want to leave as much paper on the page, just wet your finger, or give the spot a quick spritz with some water (just a mist, not too much) and gently rub with your finger. The paper will continue to come off, leaving more of the print behind!


does the back of the printed piece need to be blank?
Love this technique. Thanx for sharing!!
Hi Sally!
The “back” of the piece is what transfers. You put the medium on the side you want to transfer, then that is the side that goes down on your paper/journal page. Hope that helps!
Birgit
GREAT TIP. THANKS.!
Can I do this on top of an oil painting?
No idea! I have no experience with oil painting, so I don’t know how it would react. Let me know how it works out if you try it!
Est l aussi le meme prpduit que celui appele caparol ?
Merci
From what I understand… Oils can go on top of acrylics but not the other way.
Thank you very much, loved the way you showed and explained.!!! It works!!!
Wonderful article! We are linking to this great article on our site. Keep up the good writing. Gratiana James Kellene
Hi – can this work with a printed piece ie from a ink printer – I was thinking if I reversed the image on the computer and then printed it?
Ta
Hi Cherie!
I’m not positive it will work well. This method does rely a lot on the kind of paper you use. Older paper releases it’s top layer more easily than smooth, modern printer paper. If you printed on old book pages, that might work.
Thank you for this easy and inspiring tutorial, Birgit. It’s been awhile since I transferred an image with modge podge, and I was trying to remember when I found your beautiful blog. Looking forward to exploring your work. I like the way you explain things!
Thank you for you generosity and clear directions.
Marvelous!!! Thank you…will be using this method soon!
Est l aussi le meme prpduit que celui appele caparol ?
Merci
Thank you.
You have explained so clearly. I want to go try it immediately!
Ann