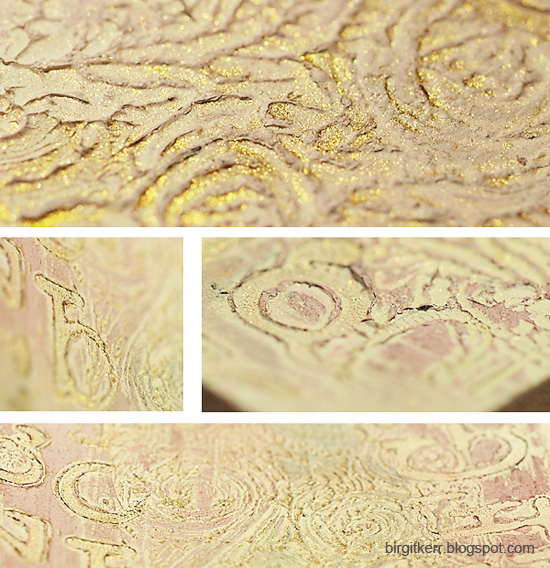
Repost from my Birgit’s Daily Bytes blog, from March 5th, 2014
Following my post about Gesso Stenciling and creating texture and interest with the puffy gesso method, I am now sharing another favorite method of mine to use Gesso to create texture for your journaling pages, paintings or other mixed media projects .

In my first gesso tutorial, we were scraping the gesso through a stencil to create texture, this time we’ll be making impressions in the gesso by stamping and drawing into the gesso.
You will need:
-
A fairly thick type of Gesso.
-
a piece of paper
-
stamps of choice
-
An optional array of: Spray inks, distress stamp pads, distress stain daubers, shimmer mists, Gilders paste, water colors, etc.
-
Optional: Heat Tool/Gun – if not heat gun, then patience!
-
Means to clean your stamps pretty much immediately. (Spray bottle with water & rag or bowl full of water to submerge stamp in, or easy access to a sink, etc.)
Before we get started, a few words on stamp choice and clean-up.
Cleaning your stamps:
Do make sure you have means of cleaning your stamps ready before you start. Once the gesso dries on your stamp, especially on more detailed stamps, you will have a really hard time cleaning them. So do make sure you clean your stamp straight after you pull it off the gesso, or at least soak it until you can deal with it.
Larger, less detailed stamps will obviously be easier to clean than others, but I’ve found that for myself, the quickest and easiest way to not ruin my stamps, but also not interrupt my flow, is to have a spray bottle of water and a rag handy. After I pull the stamp up, I wipe it, spray it generously with water, wipe again and that usually does it!
Choice of stamps:
Pretty much any stamp will work – in theory! There will be some experimenting involved though!
Larger, deeper stamps tend to work better when the gesso is applied thicker, while the more shallow type of stamp works somewhat better on a thinner application of gesso. I have found that fine writing type of stamps don’t tend to work very well. They do create texture, simply by being pulled up from the gesso, but they don’t tend to leave much of a writing impression. Larger ones, of course, will work fine!
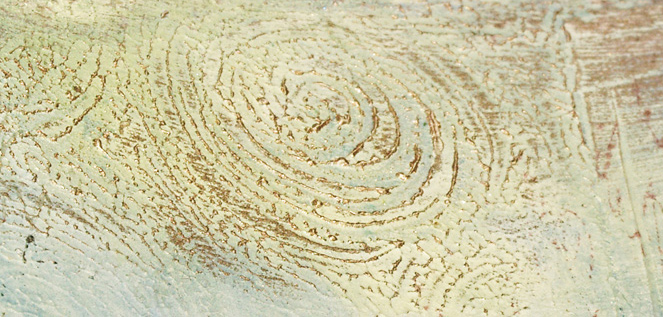
Here is an example of a fairly fine and detailed stamp used on a thin layer of Gesso.

You don’t actually need any particular stamps. You would simply use any object you can press into the gesso and experiment with texture that way. Even a flat piece of rubber or the back of a stamp, when pressed into the gesso and then pulled up, will leave a pretty cool impression with little pulled peaks.

If you don’t want to use your rubber stamps, you can make your own. For example, wrapping rubber bands around a wood block or other solid shape, makes some cool linear patterns when stamped into the gesso.
You can also use any object you desire, to scribble into the gesso, as you will see later in the tutorial.

I would like to apologize in advance for the odd lighting in some of my step-by-step pictures. It’s quite hard to photograph white on white with any kind of clarity, and when you add shimmer anything to it, it can get a little tricky.
But now, without further ado, here is how we do it!
1.) Spread a layer of thick gesso on your desired area of the paper/canvas/painting. I like to use a large flat brush for this, as it tends to gives a more even spread of gesso, but you can also use an old gift card, foam brush or spatula too.

You need to work relatively quickly here, especially if you want to use more than one stamp, as the gesso dries fairly quickly, depending on your level of thickness.
2.) Press your chosen stamp into the wet gesso, then pull it back up.


3.) Then, as mentioned above, wipe your stamp and if that didn’t remove all the gesso, spray it with some water, or soak in a bowl of water until you are ready to clean it properly.

Stamp on the right sprayed with water, awaiting it’s clean-up later.
4.) Proceed with as many more stamps you would like to use.

5.) Let it dry. Now, in essence, the texturing is done! If you have a preferred method of coloring your textured backgrounds, go ahead and do that now. I will show you my favorite ways to bring out the texture and highlight it in the following steps.
Again, it is important that the gesso is completely dry for the next steps. You can either let it air dry, or if you’re impatient like me, you can use your heat tool to speed up the process. If you are using the heat tool, you could even go and puff the gesso up in some places by holding the heat gun closer and longer to those areas and combine two methods.
6.) Onto the coloring.
I love to use sprays for these first few steps. I tend to dilute ink sprays a fair bit, then spray it onto the texture. You can spray generously, let it drip, run into each other etc., but don’t overdo it on the wetness factor. Also be aware that the gesso with soften just a bit with all that watery spray on top of it, so don’t do anything that would require a lot of hard wiping or blotting, as you may end up wiping some of your texture off.
When I don’t use sprays, I like to apply water colors with big wet brushes, randomly across the page and let it do it’s thing. Let the excess run off, so the gesso doesn’t get too soggy.

I really love to use shimmer mists at this stage too. They have the tendency to connect with the color and run into all the groves and collect in lovely shimmery puddles, giving quite unique outlines.

Let everything dry completely again.
7.) Distress it. As you may have noticed, if you’ve followed my blog, I’m a big fan of the distress ink line. The pads, the daubers, I even use the reinkers to make my own spray inks in the mini misters at different depth of color.

Well, they are also my favorite for this! They give us color, but mostly just a hint, allowing us to build up many layers. My other favorite are chalk ink pads – they also give a lovely, soft color without being too stark.
I just take one of the distress ink pads and lightly run it over all the texture. If you get too much of it in one place, either just use your finger to smear/smudge it and fan it out some, or take a small wet brush, add a tad of water and gently wipe it off.
8.) Keep on layering color.
I also love to use the distress ink daubers for this. Again, much like with the pads, I run them lightly in areas of the texture, then use my finger to smudge and soften it. You can also just dab a little on your finger and smudge that into the areas you want colored, giving you even more control.

Make sure you let everything dry between layers, so you don’t end up with muddy areas where everything mixed too much!
I sometimes also use a dotted or script stamp with a Stazon ink pad (water proof,) to stamp lightly over the texture, like I did in the example below. Then I just carry on layering over the top of it to integrate the stamping. Because you continue to layer on top of it, make sure you use a water proof stamp pad, otherwise you end up with smudged stamps and muddy colors.

Let it dry between each step.
9.) As a last step, I often run a metallic stamp pad or my finger tip full of gilding paste along the top peaks of the textured area. This further brings our some of the peaks and valleys of the texture, while lending it a distressed kind of shimmer.
And that’s it!

I hope this has given you some ideas and inspired you to go and experiment with gesso textures yourself! I would love to see and hear about what you are creating!

leave a comment